If you have a TP-Link and want to increase your network's safety and perform more practical and efficient access control, this article is for you. Keep reading to find out how to perform.
About TP-Link
TP-Link is a brand that has several models of routers and electronics. Currently has the conquest of having the best selling router model in Brazil, the Archer C60. Through the TP-Link router you can make blockages using “Whiteslist”, but it doesn't have much lock efficiency. For this, we recommend using an external tool that is practical and efficient for blocking.
Ways to increase security and perform content control
There are many content filtering services available on the internet that can be used to block access to specific websites. Some examples include:
- NextDNS : It is a DNS service provider that offers content filtering options beyond security categories. You can configure the TP-Link router to use OpenDNS DNS servers, link the IP on the platform, and activate desired content filtering options.
- DNS Filter : It is another DNS service provider that offers content filtering options beyond security categories. You can configure the TP-Link router to use OpenDNS DNS servers, link the IP on the platform, and activate desired content filtering options.
- Lumiun DNS : It is a Brazilian system that filters content with integration in various equipment, including TP-Link routers. With more than 70 smart filters you can see real -time accesses through insight and reporting pages. . Its use is fast and easy without the need to install new software or purchase of equipment.
- OpenDNS : It is a DNS service provider that offers content filtering options beyond security categories. You can configure the TP-Link router to use OpenDNS DNS servers, link the IP on the platform, and activate desired content filtering options.
How to perform blockages with Lumiun DNS on TP-LINK
Lumiun Lumiun DNS is a new DNS filtering and content classification service. It is used to simplify the process of blocking improper websites, increase network security and apply specific content filters. There are two modes to configure Lumiun DNS on a TP-Link router.
We provide a step -by -step guide to make these settings in our aid center . Check out the step by step for the installation.
Step 1: Create an account on Lumiun DNS
Visit https://dns.lumiun.com/register to create your free account. When creating the account, you will be using the Starter plan. Basic Protection and Adult Content filters .

Step 2: Confirm registration via email
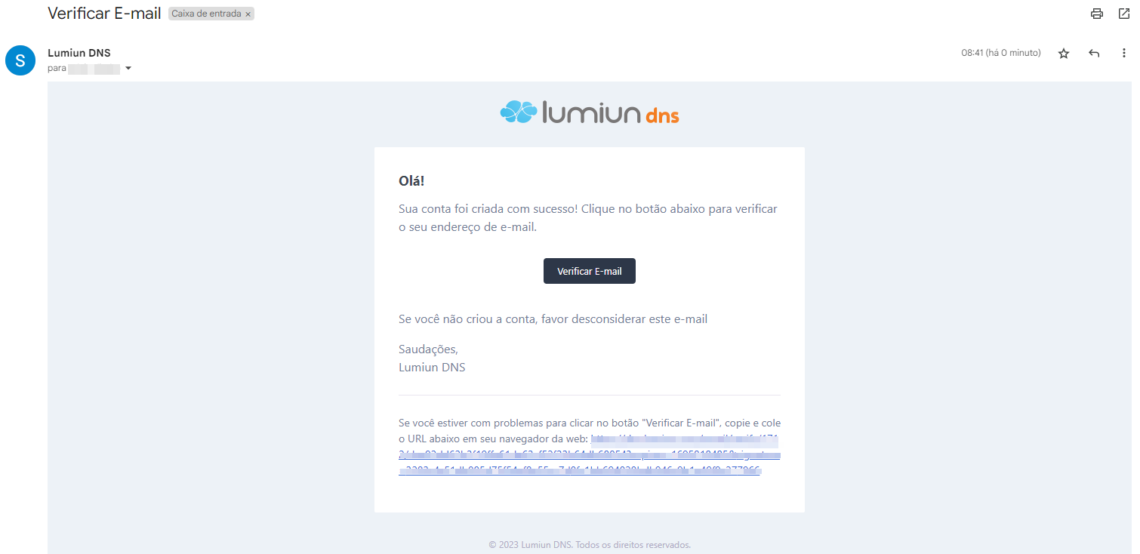
After registration, confirm your account via the "Check your email" in the email that was sent to you. If the email is not in your inbox, check the spams and mark as “no spam” to receive the next.
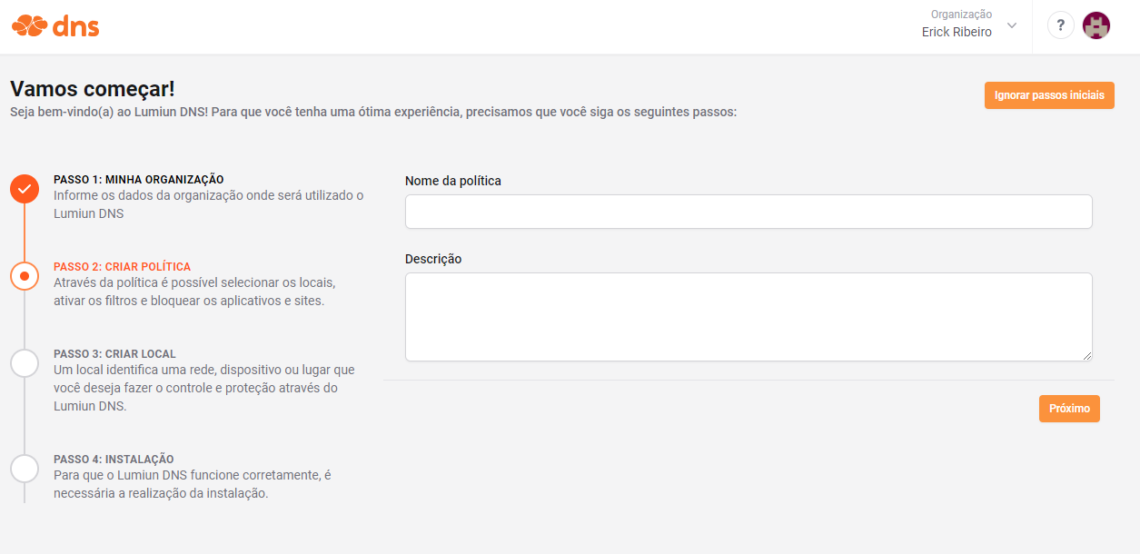
Step 3: Complete the initial steps
Lumiun DNS control panel . To facilitate the experience, a 4 -step page is displayed.
The first step is to insert your organization's name and contact phone.
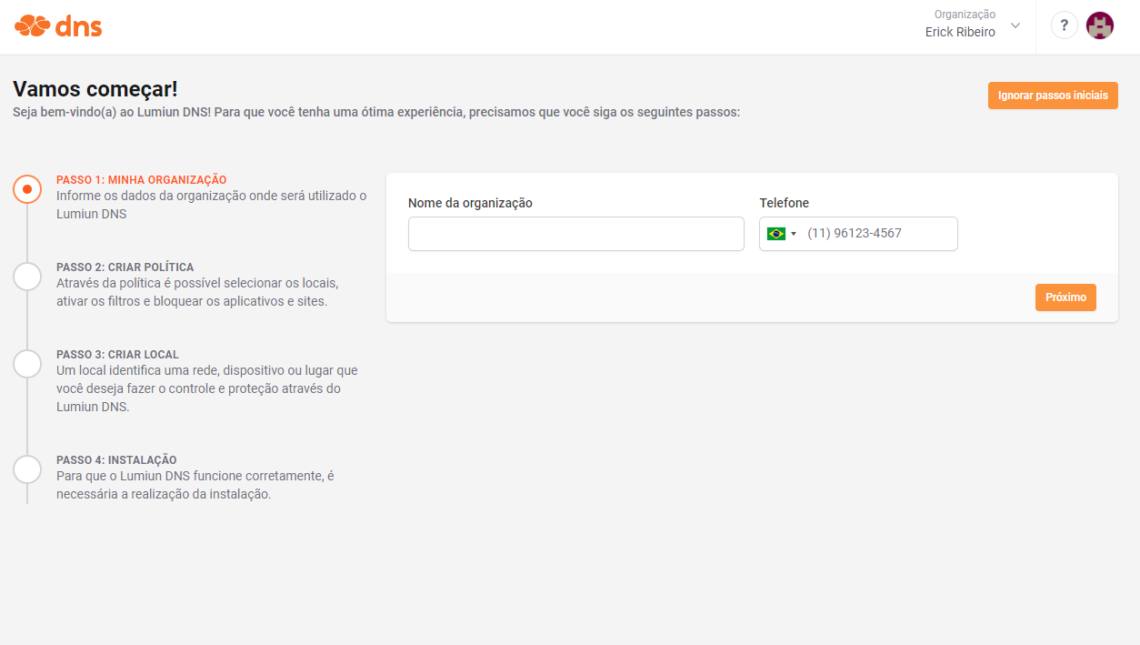
The next initial step is to create politics . Through the policy you can select locations, activate filters and block applications and websites.
Step 4: Register new location
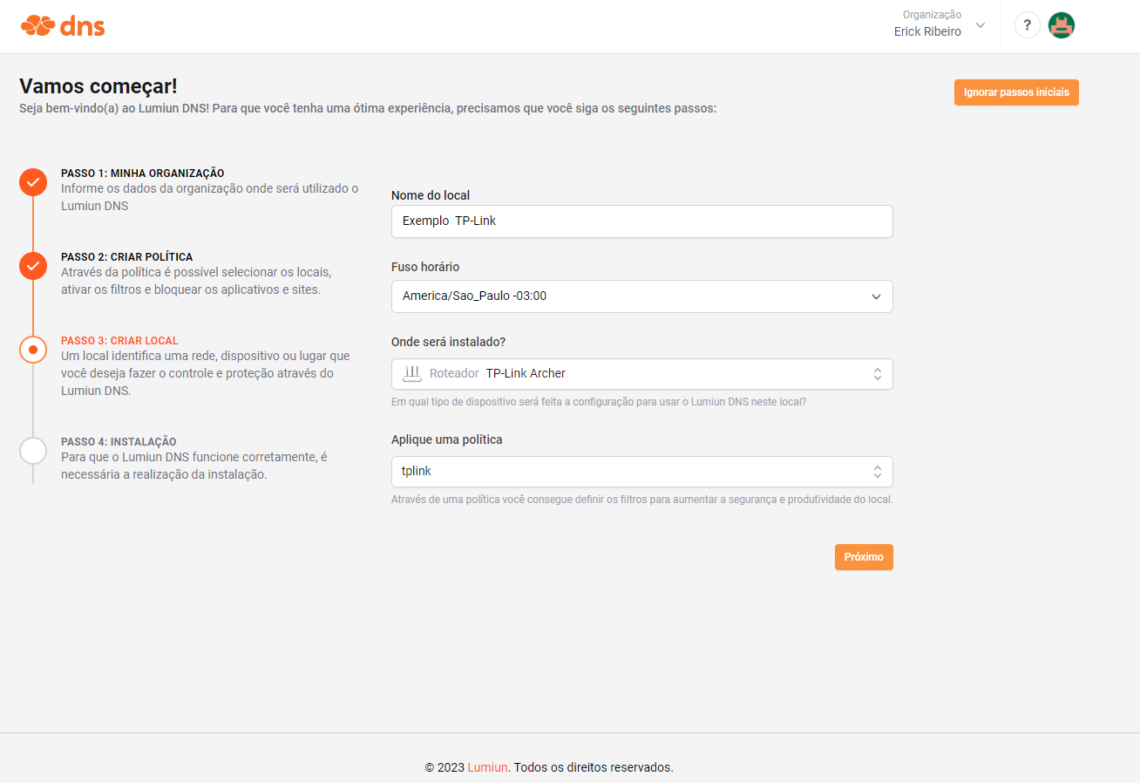
In Lumiun DNS a location identifies a network, device or place that you want to control and protect.
To register a place fill in the name field, select the spindle, the device where Lumiun DNS will be configured, in which case TP-Link, check the policy created in the previous step and click the "Next" button.
Step 5: Configure TP-Link
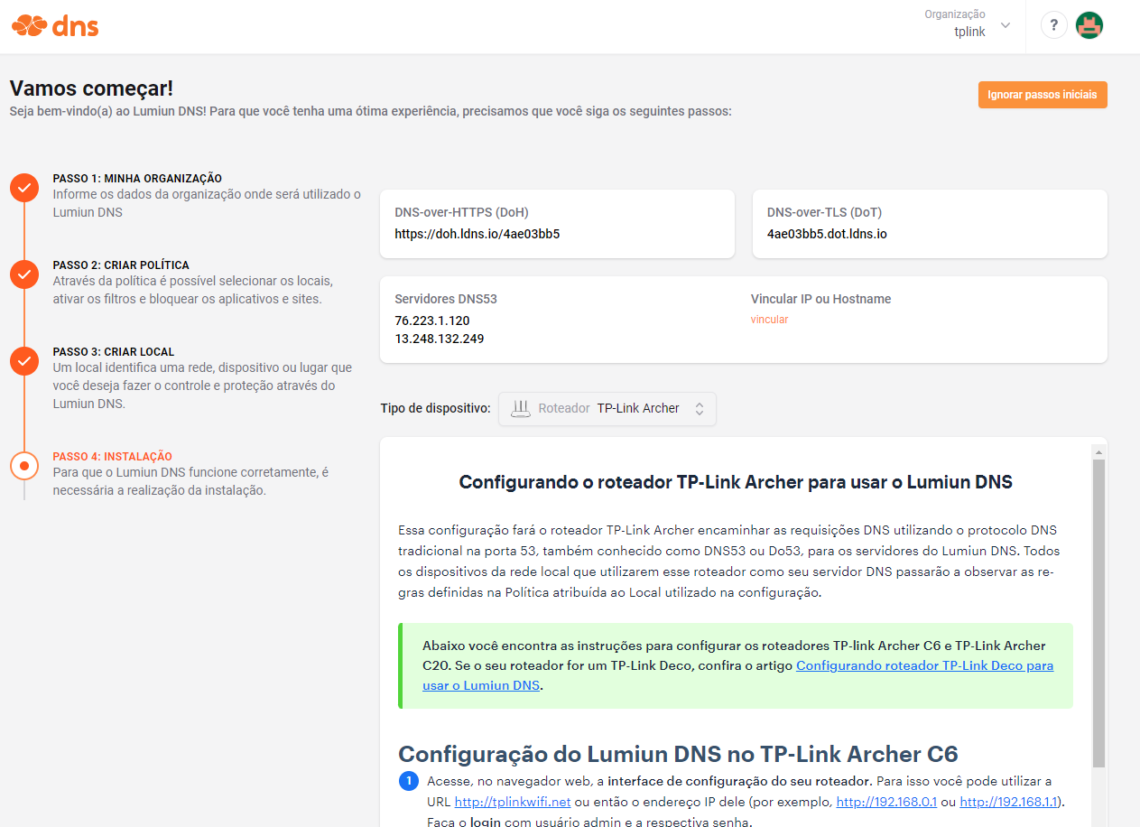
When you arrive at the last initial step, you will have the TP-Link Router Installation Guide . The installation guide contains both options, one for you that has a fixed IP and one to use a DDNS.
Watch this video to exemplify the configuration:
Step 5: Activate lock filters
Lumiun DNS panel , click on the “Policies” at the top of the page, select the policy created and in the Safety and Privacy section, enable the desired filters. There are more than 70 filters available for the pro plan .
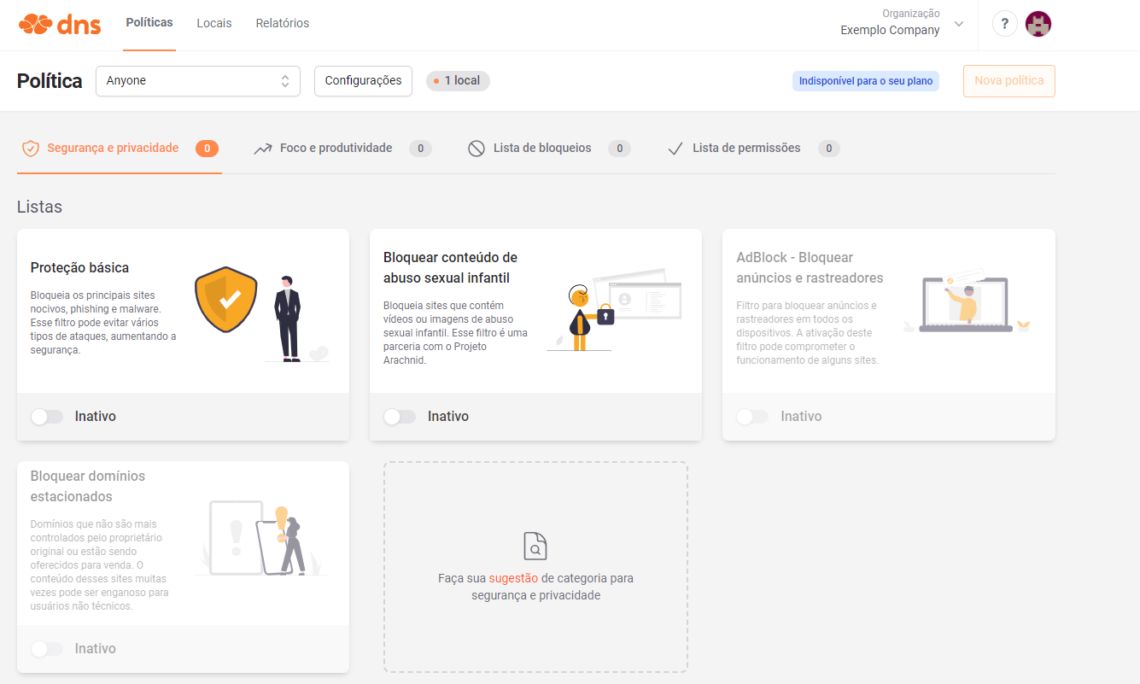
In the “ Focus and Productivity ” section, you can activate adult content lock.
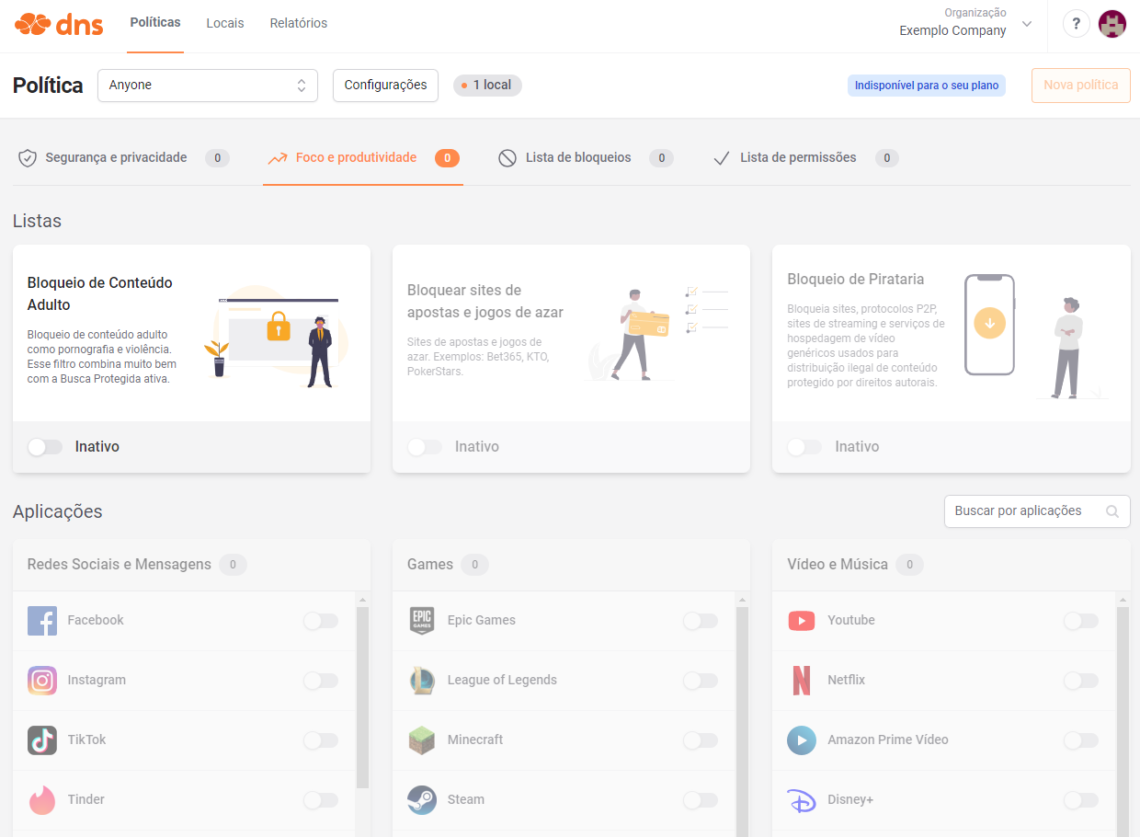
Step 6: Block specific websites
In the pro plan you have available other features such as the lock list, personalized lock page, unlimited policies and locations and others .
Step 7: Test the lock
“Adult Content Blocking” filter Lumiun DNS lock screen will be displayed.
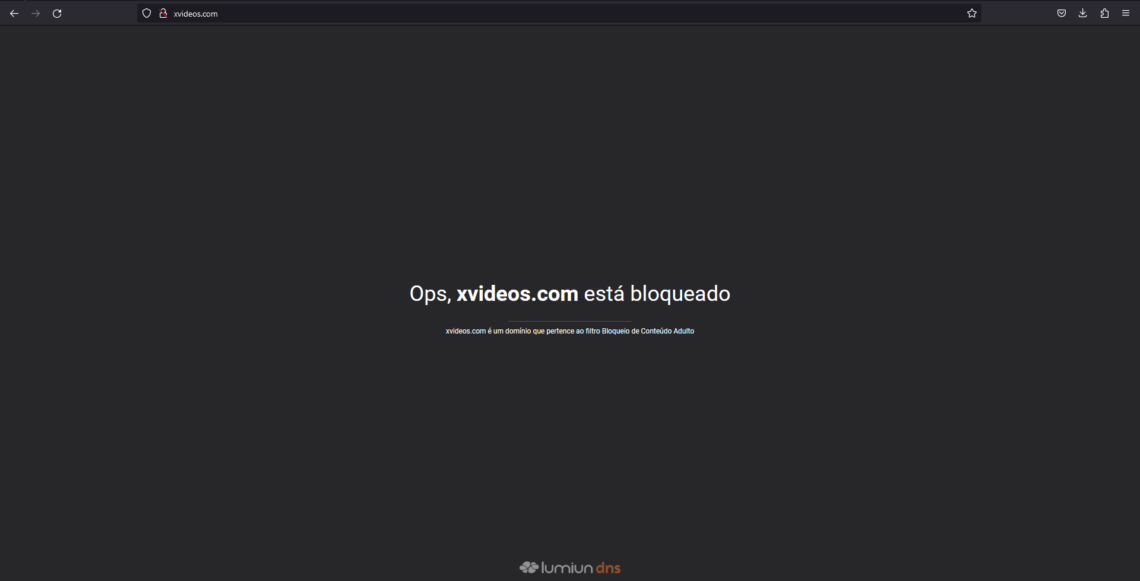
In the pro plane you can customize the lock page with the desired logo and a preference message.
Step 8: Reports
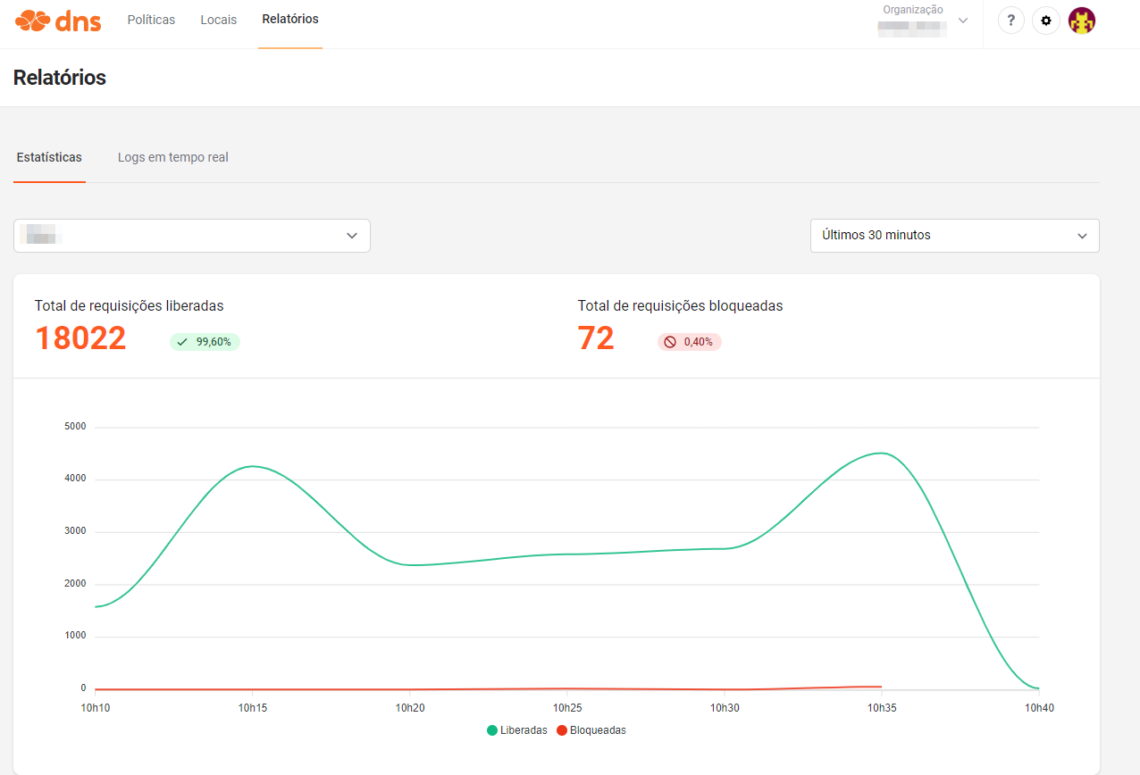
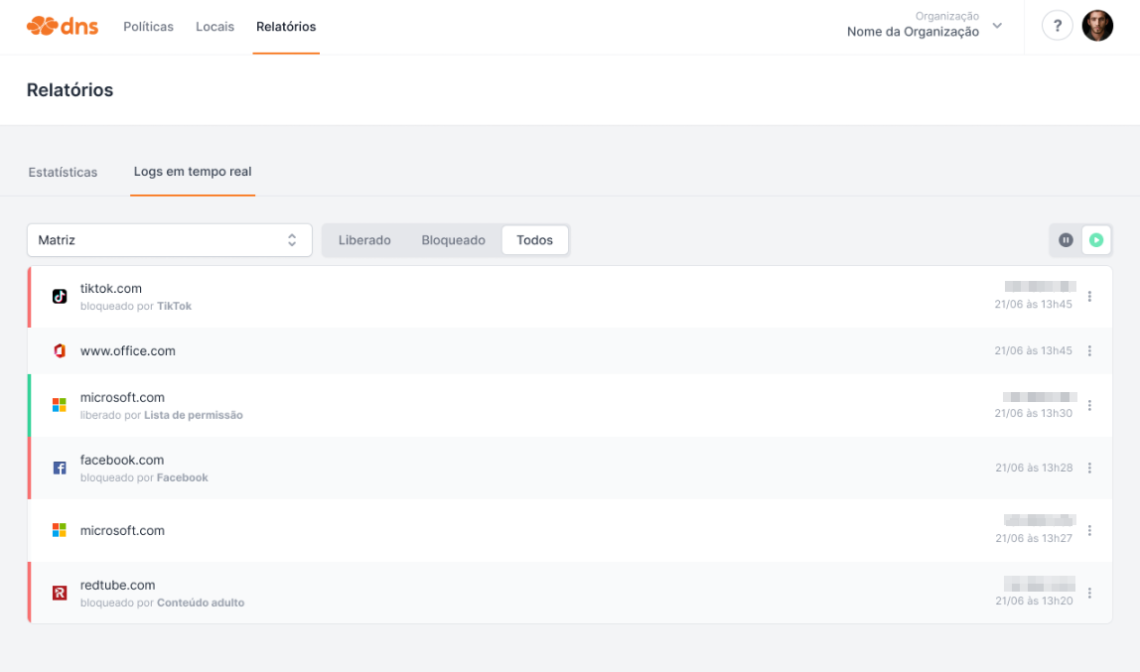
Visit the Reports to view access request statistics and the real -time log of DNS queries.
Important Features of Lumiun DNS
- Without the need for lists maintenance;
- Cloud filter management;
- Normalized lists for the Brazilian user;
- Without the need for extra equipment;
- Blockages by time lanes;
- Graph with volume of requested and blocked requisitions;
- Statistics with the most blocked sites;
- Real -time logs;
- Protected search to remove adult content from the main search engines;
- Support in Portuguese with access to analysts via chat on the panel.
Install Lumiun DNS for free through the Lumiundns.com
Lumiun DNS Partner Program
If you are a Managed Service Provider (MSP) for solutions to optimize your services and offer additional value to your customers, Lumiun DNS has a partnership program that can be the ideal solution for your business.


