


If you want to block websites or unwanted content on your network and still view access logs and statistics, this article is for you!
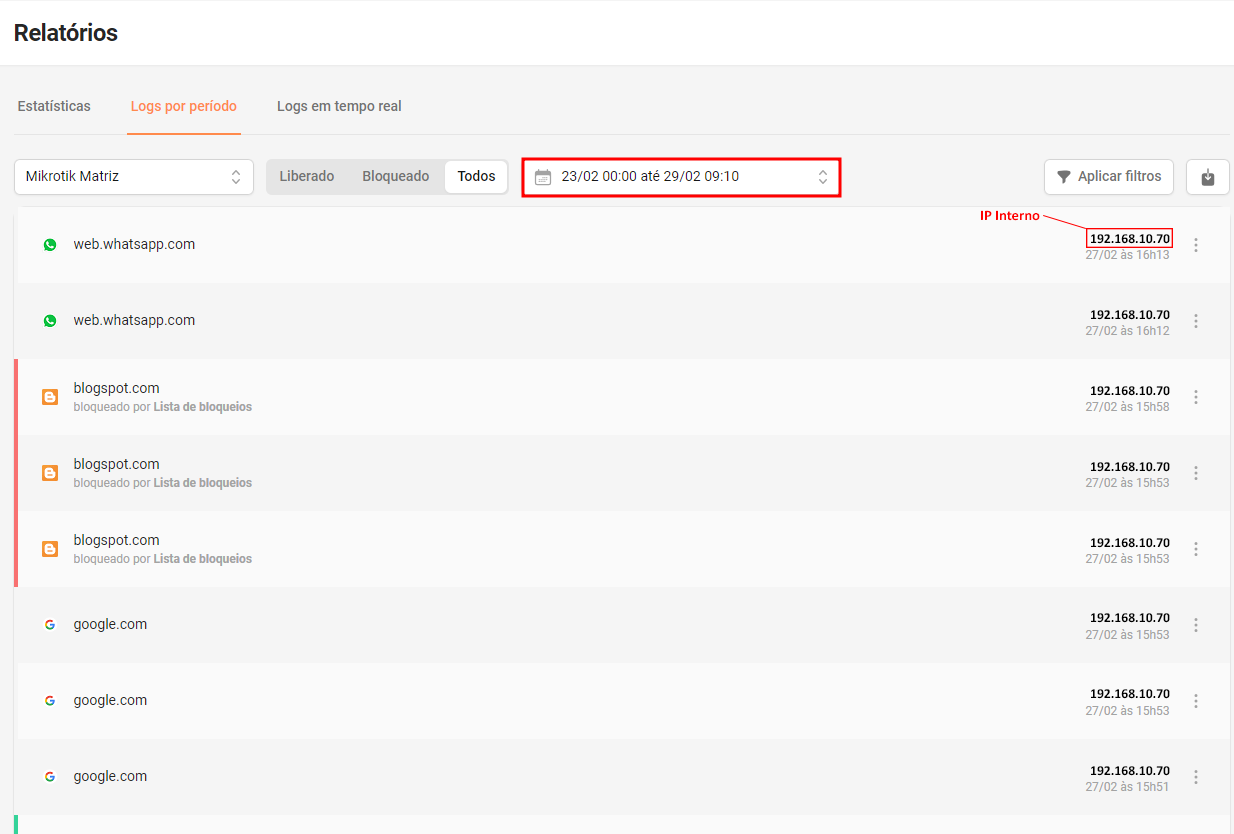
A constant pain for those who use Mikrotik is the visualization of access reports in a simplified and complete manner. With Lumiun DNS in addition to applying network access rules, you have a report of reports to be viewed in a simple and objective way, containing the most important information to obtain during a DNS requisition, namely: requested domain, allowed/denied access, requisition time and the internal IP of the device .
All information on a page for viewing of different locations, networks and equipment? With Lumiun DNS Yes!
Starting at Lumiun DNS
To take advantage of all available features, you must first create your account. See below:
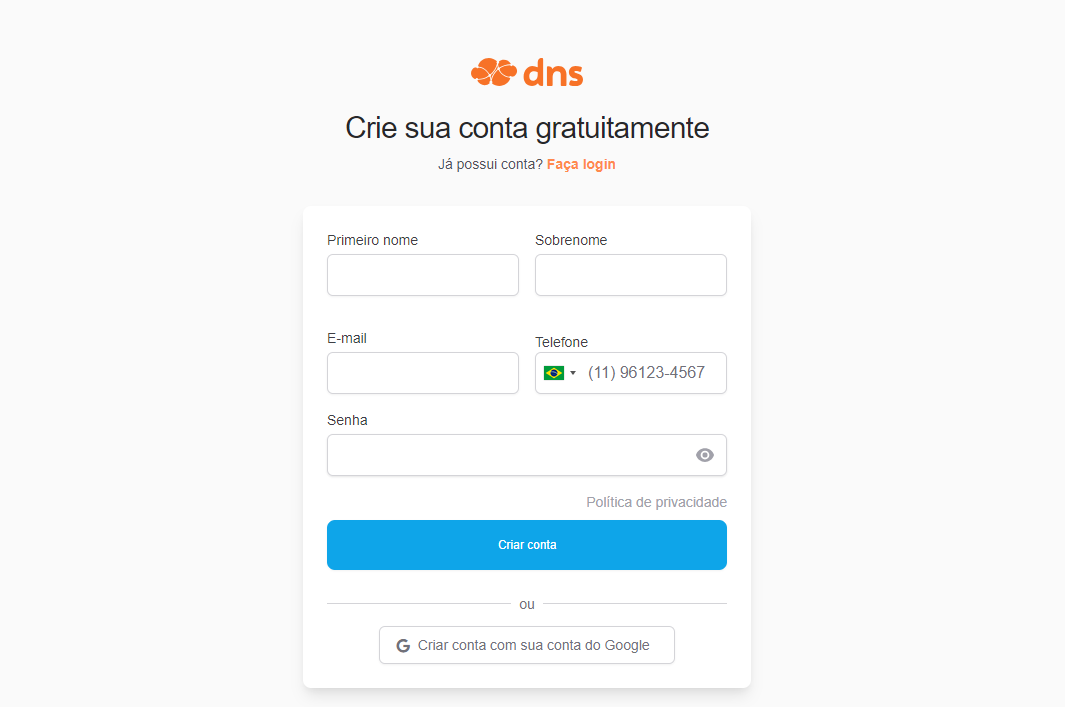
Create an account with Lumiun DNS
Visit https://dns.lumiun.com/register to create your free account. When you create the account, you will be starting a 14 -day pro plan for plan. After 14 days, you can choose from free (free), pro or education plans.
Fill in your first name, surname, email, phone and password to create your account for free. If you prefer, you can create directly with your Google account.
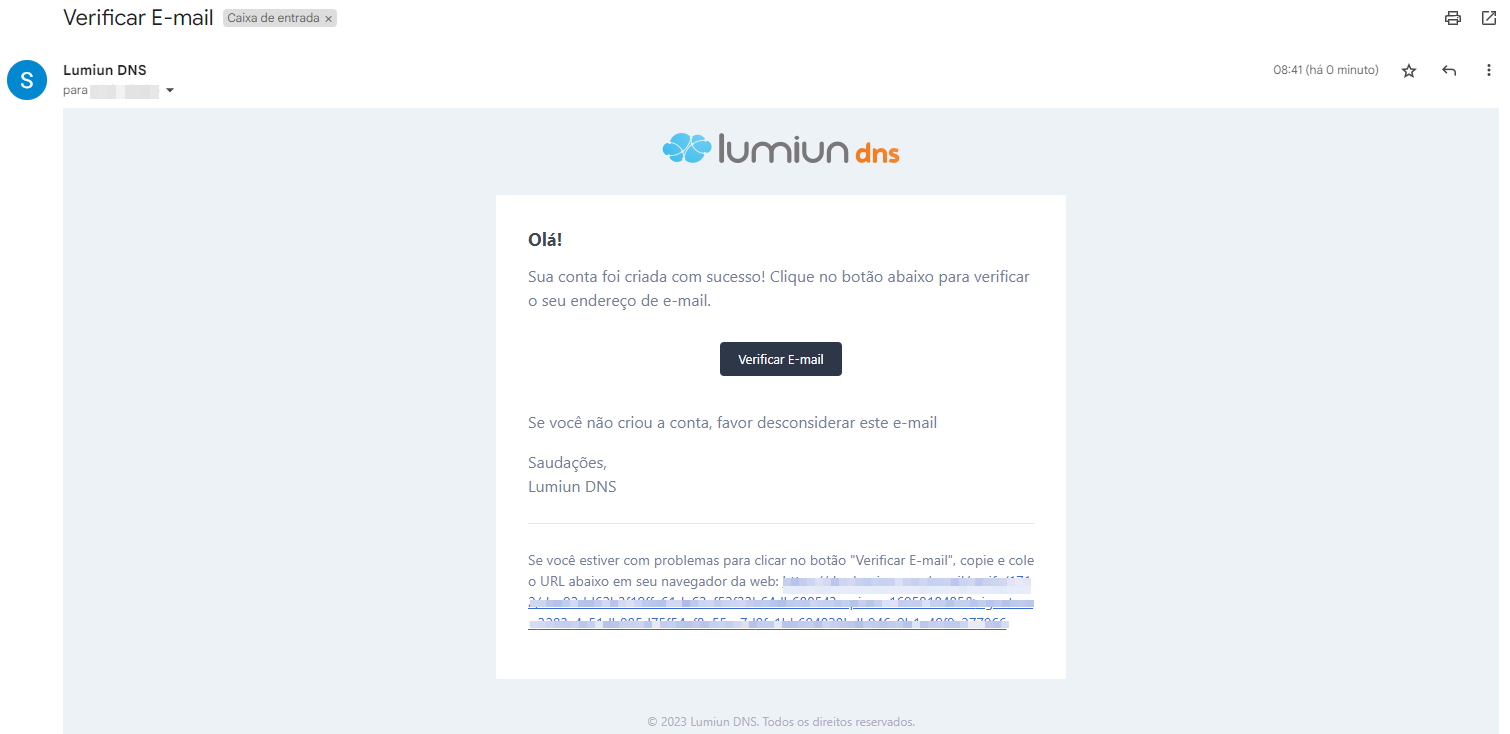
Confirm registration in the email
After registration, confirm your account via the "Check your email" in the email that was sent to you. If the email is not in your inbox, check the spams and mark as “no spam” to receive the next.
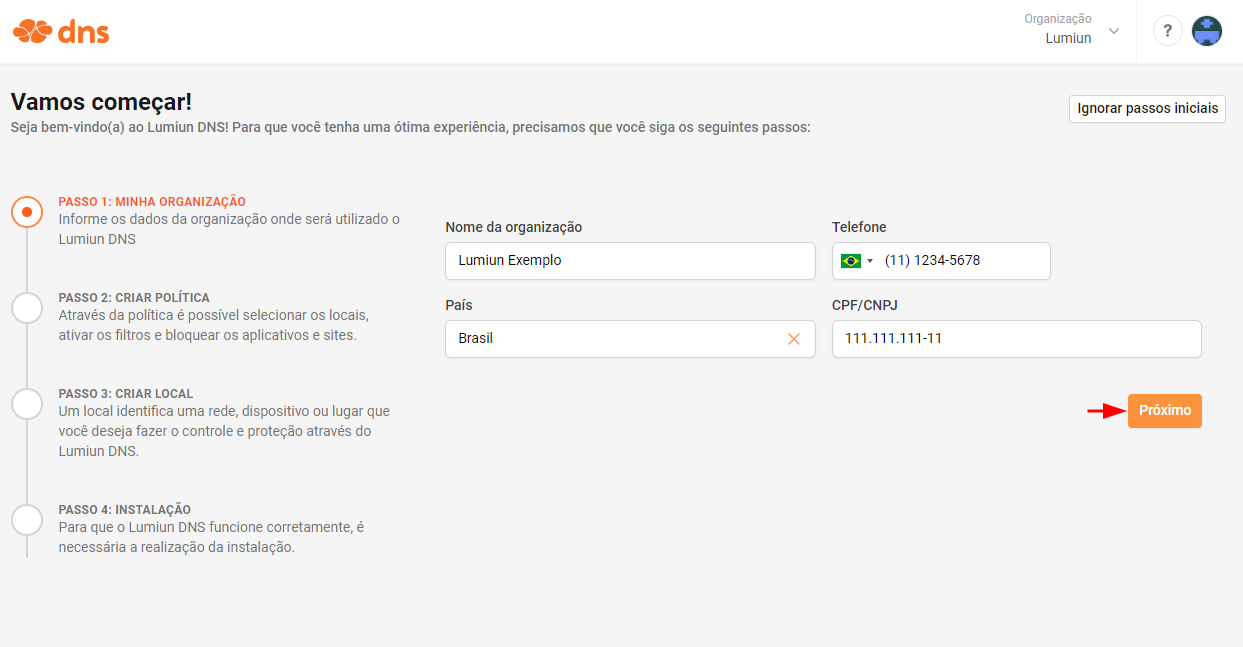
Complete the initial steps
Lumiun DNS control panel . To facilitate the experience, a 4 -step page is displayed.
Step 1: Insert the information of the organization
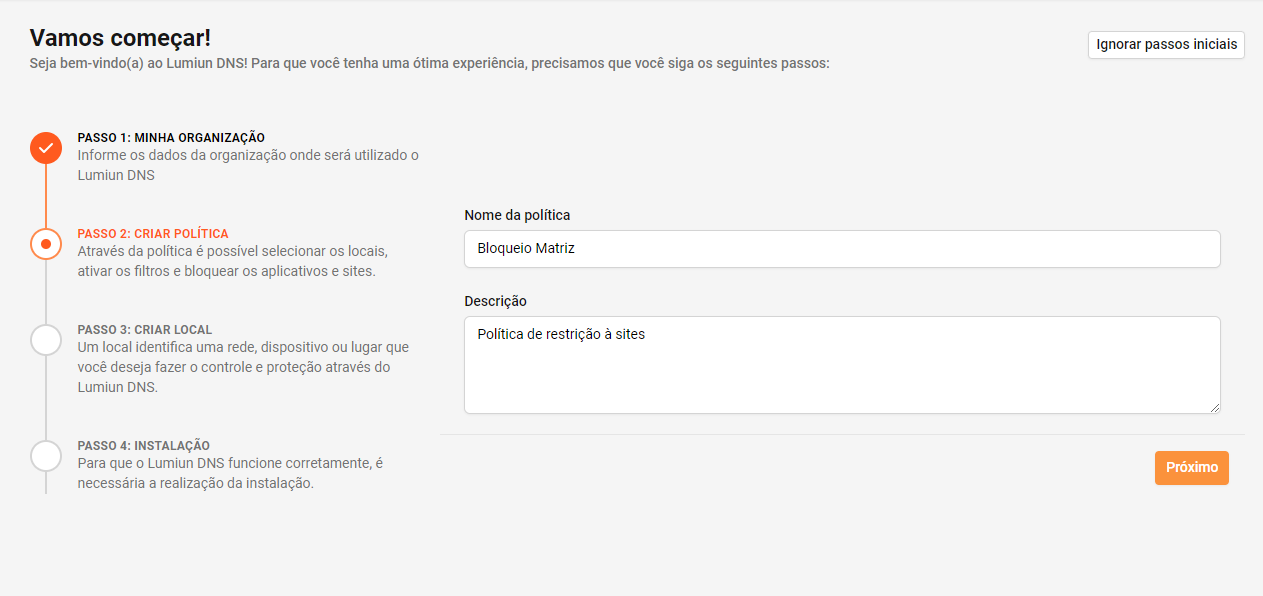
Step 2: Create politics
Through the policy you can select locations, activate filters and block applications and websites.
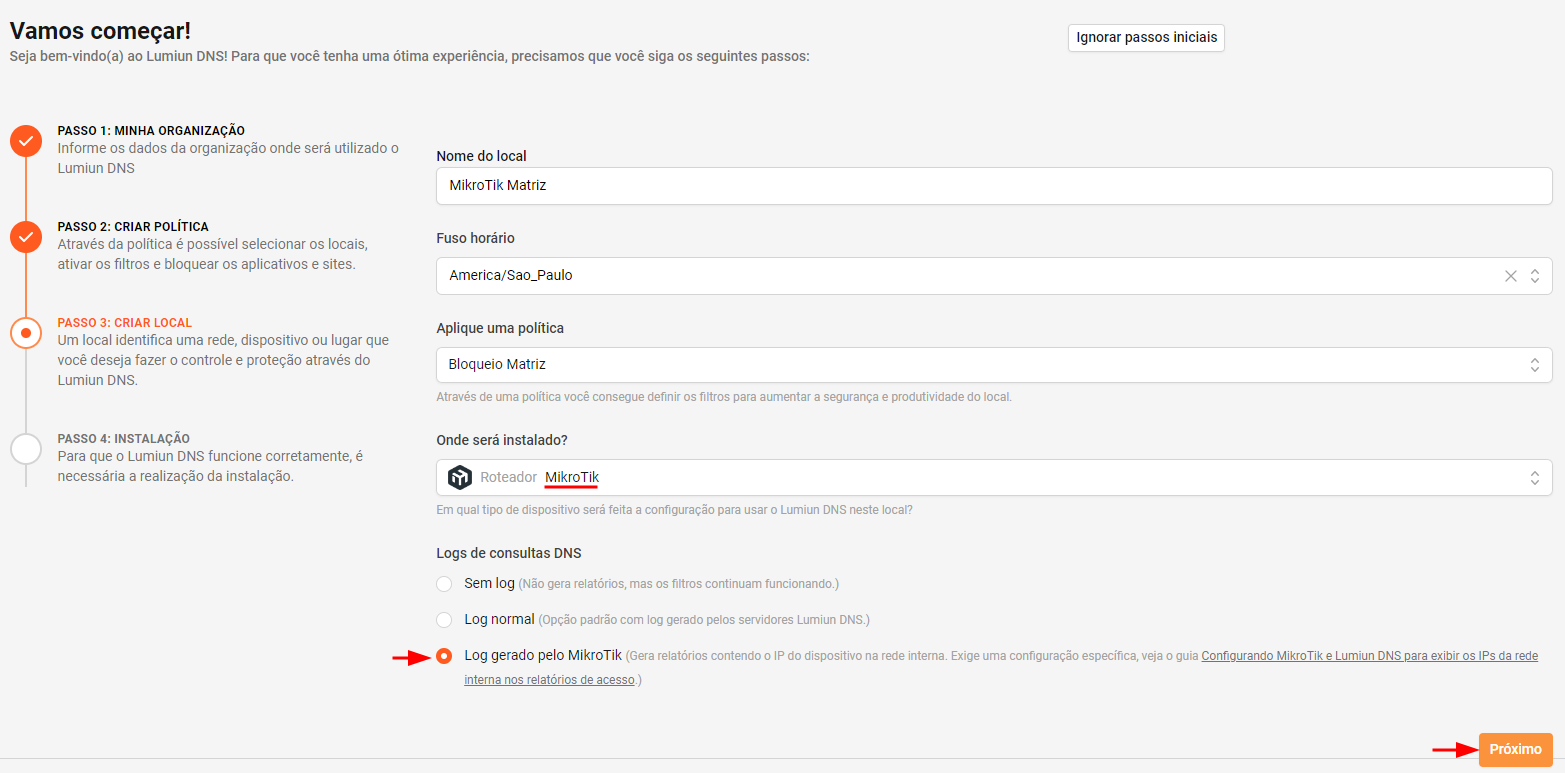
Step 3: Register New Local
In Lumiun DNS a location identifies a network, device or place that you want to control and protect.
To register a place fill in the name field, select the spindle, mark the policy created in the previous step, the device in which Lumiun DNS will be configured, in which case Mikrotik, and click the logotik -generated log to get internal IP information. To proceed, click the "Next" button.
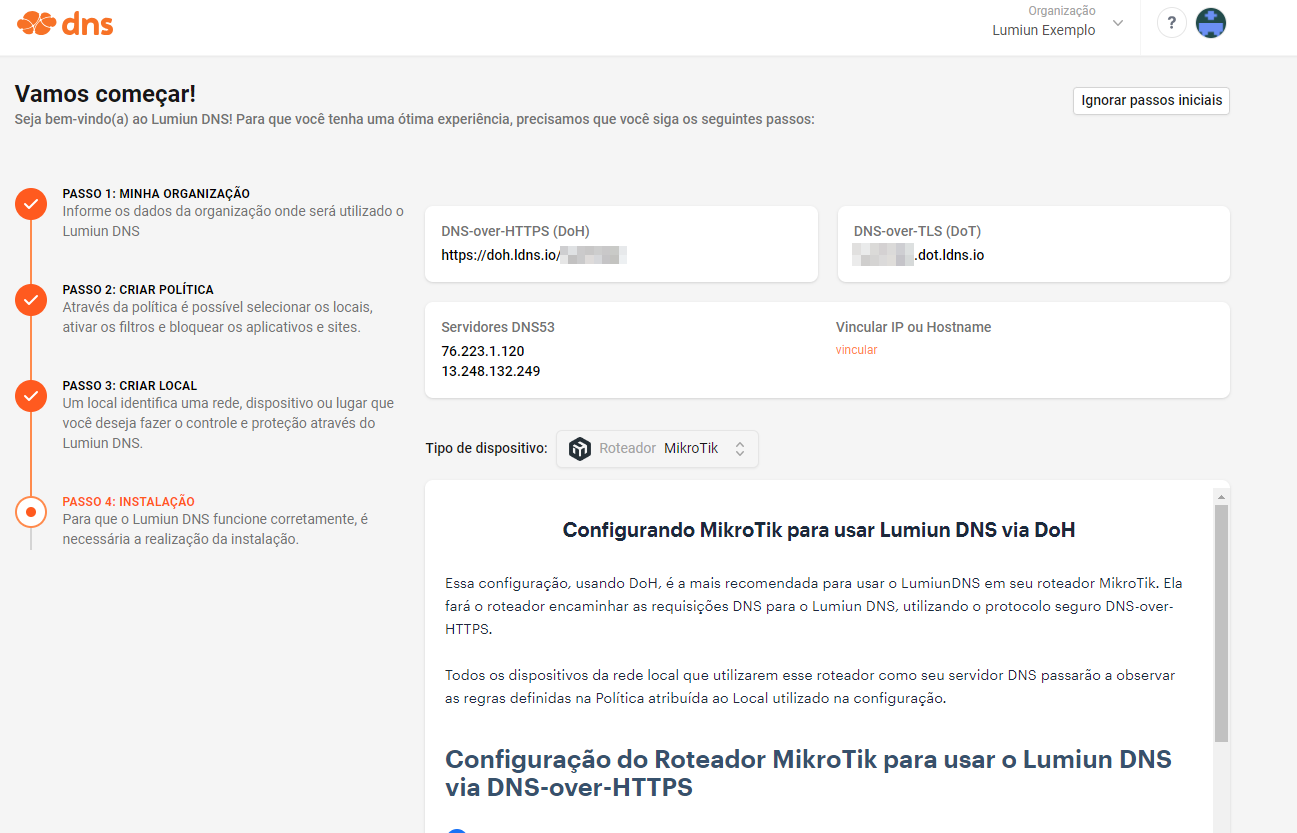
Step 4: Installation
Here you will have the information you need to install Lumiun DNS . In addition to the information of DOH, DOT and DNS53 servers, there is an installation guide to make the configuration using DOH ( the installation guide in step 4 is shown according to the device chosen for installation in step 3)
Mikrotik Installation Guide
This guide is the same present in step 4 quoted above. See below how to make the configuration:
- Visit the web management interface of your Mikrotik router, for example http://192.168.88.1 , and login. webfig button at the top of the page.
- Visit the IP menu → DNS .
2.1. Servers field with 8.8.8.8
2.2. Use Doh Server field with https://doh.ldns.io/abcd1234 (replacing ABCD1234 with the desired location ID - see which ID is on your site ) .
2.3. Allow Remote Requests enabled .
2.4. Max. Concurrent Queries field with the value 1000
2.5. Max. Concurrent TCP Sessions field with the 200
2.6. Click Apply .
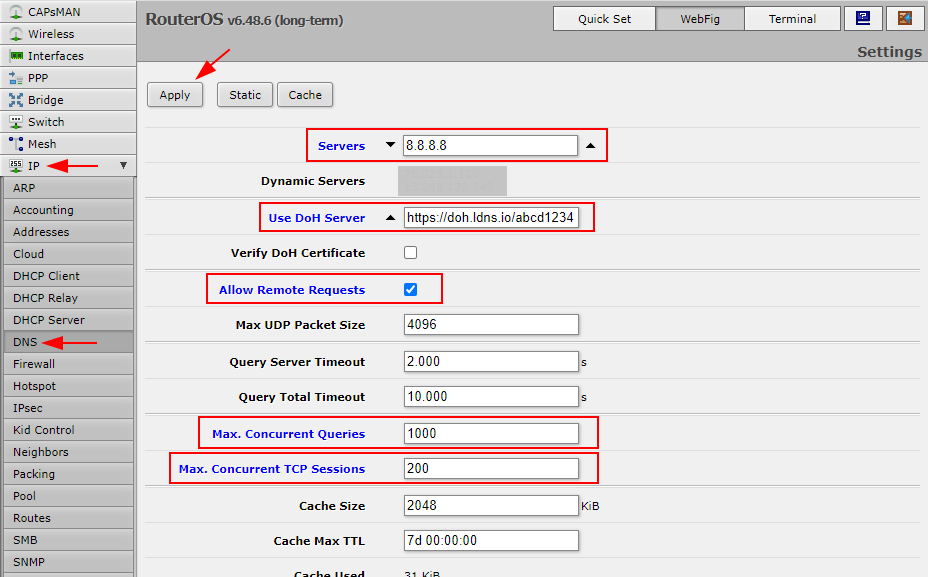
- Still on the IP menu → DNS , click cache and then flush cache .
- Visit the IP menu → DHCP Server .
- Click on the Networks . Click on your network that appears listed. For example, 192.168.88.0/24.
- DNS Servers option with the same address contained in the Gateway option located above. Click OK .
It is configured, you can already view the reports.
Internal IP Identification in the reports
The first configuration will make your network go through Lumiun control and you can already view the reports in real time. However, for the report to have the internal IP information that made the request, an additional configuration is required. See below how to perform:
- Visit the web management interface of your Mikrotik router and login. webfig button at the top of the page.
- Visit the System menu → Logging , click the Actions and then click the Add New .

- In the new action that is being created, enter the following values:
-
- Name : Lumiundns
- Type : Remote
- Remote Address: 52.67.138.30
- Remote Port: 4514
- Click OK
4. Still on the System menu → Logging , click the Rules and then the Add New .
5. In the new Rule being created, inform the following values:
-
- Enabled : Yes
- Topics : Select DNS E ! packet
- Prefix : Inform the ID of the place registered with Lumiun DNS (replacing ABCD1234 with the desired location ID - see what ID is on your site )
- Action : Lumiundns
- Click OK
6. Okay, now your reports are complete, with identification of internal IP.
Thus, we find that configuring Mikrotik in conjunction with Lumiun DNS is an affordable task, providing a good experience for users. By following a few simple steps, such as accessing the Mikrotik Router Web Management Interface and setting DNS servers, you can easily integrate services. In addition, the identification of internal IP in the reports is an additional valuable functionality that can be activated through this integration. Making it possible for network administrators to follow the activities in real time and accurately identify the source of requests, making network management more efficient and safe.
Manage multiple networks
As mentioned earlier, you can register more than one network for control and view. To do this, simply go to the site page and select the “New Local” option, located in the upper right corner.
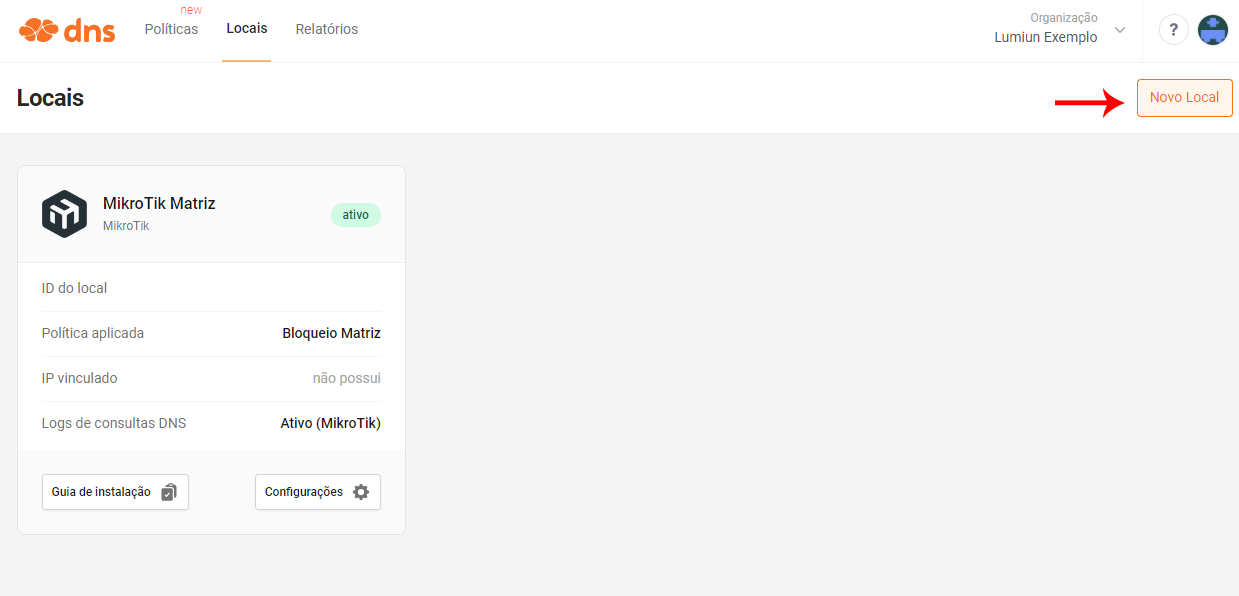
Enter information about your new location and where it will be installed. After that, simply make the configuration on the equipment, as described earlier, if you prefer simply access the installation guide just below the place created.
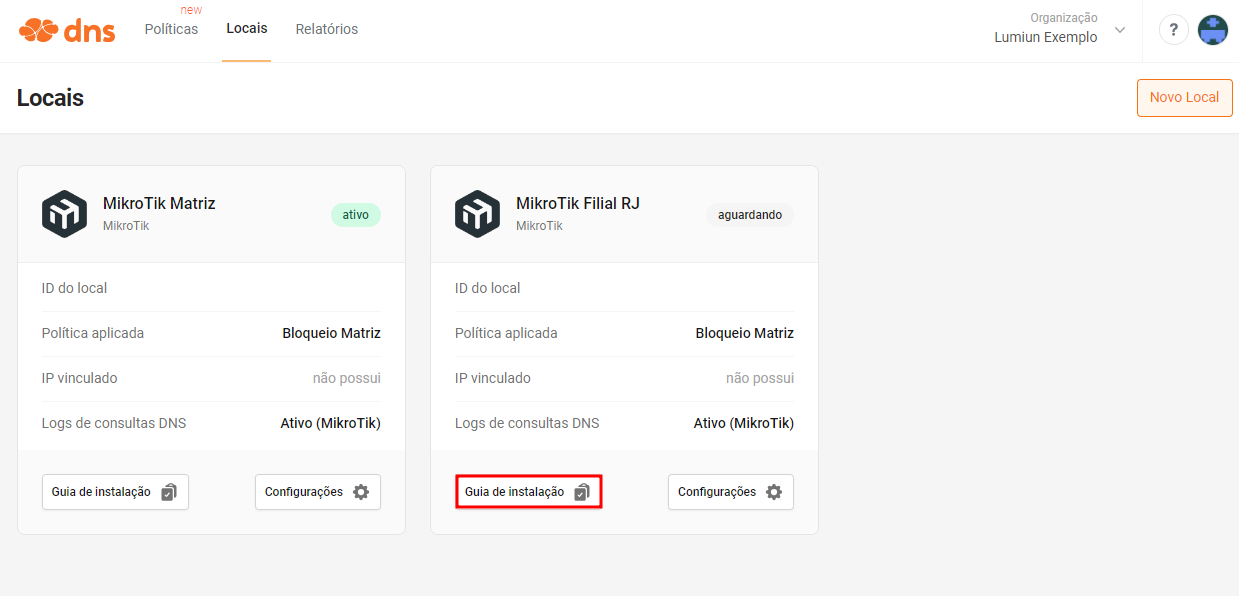
This way you can manage multiple networks and apply security and access control rules, as well as viewing the reports of each place created.
Viewing the reports
Here's how to access the report page, export information and access logs in real time.
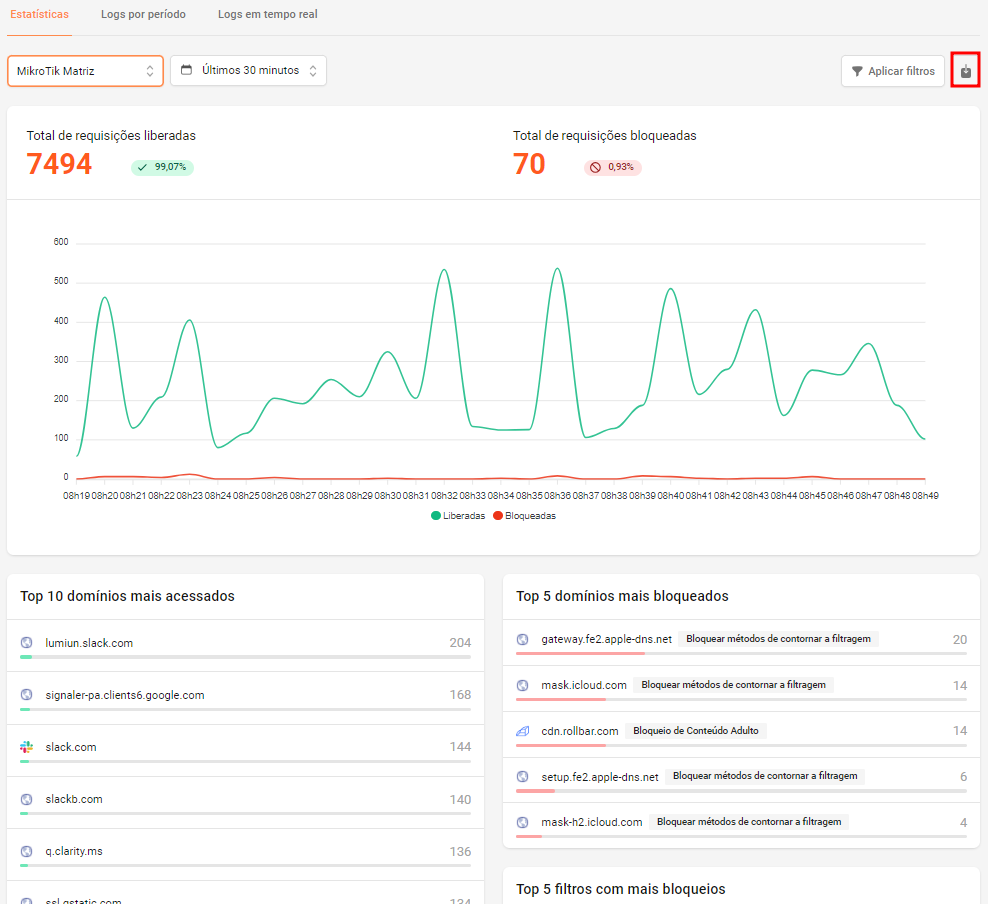
When accessing the report page, you are directed to the statistics where you can view comprehensive information from the selected location. The information available on this page corresponds to: Total Requests released, total locked requests, top 10 most accessed domains, top 10 more locked domains and top 5 filters with more lock. You can export this information in a .pdf file.
Still on the report page, you can navigate to the registration tab per period. Here you can view access reports from a given period of the desired location. And also export information to store or use.
Lastly, you can view the logs in real time. Here the access logs are updated all the time, bringing in real time what is being accessed on the network. See below.

Lumiun DNS Partner Program
Thus, we find out how it is possible to block sites and view multiple networks reports using Mikrotik through simplified installation and integration.
If you are a Managed Service Provider (MSP) for solutions to optimize your services and offer additional value to your customers, Lumiun DNS has a partnership program that can be the ideal solution for your business. Our solution provides complete control and visibility on traffic, ensuring unified network management to MSPs, as well as boosting the growth and effectiveness of the operation.
